


- Regrouping means to exchange 10 of a particular place value column for 1 of the next place value column along.
- 10 individual ones (units) regroup to make 1 ten.
- 10 individual tens regroup to make 1 hundred.
- 10 individual hundreds regroup to make 1 thousand.
- Regrouping is needed when there is 10 or more in any place value column of a number.
- Regrouping in addition is called carrying.
- Regrouping in subtraction is called borrowing.
10 ones can be regrouped to make a ten, 10 tens can be regrouped to make a hundred and 10 hundreds can be regrouped to make a thousand.


- Regrouping is needed when there is 10 or more in any place value column of a number.
- We count ten ones and regroup them into a ten.
- We carry this ten over from the units column into the tens column.
- There are ‘3’ ones remaining in the units column so we write a ‘3’ here.
- There are ‘3’ groups of ten so we write a ‘3’ in the tens column.
- There is ‘1’ group of one hundred in the hundreds column so we write a ‘1’ here.


Regrouping Place Value Activities
Representing Numbers using Place Value Blocks: Interactive Questions
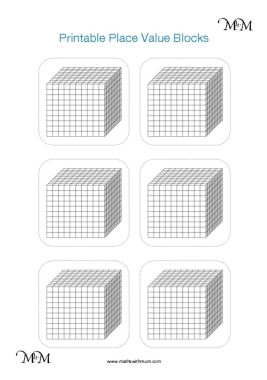
Base Ten Place Value Blocks Interactive Manipulatives
Teaching Regrouping using Base Ten Blocks Printables


Regrouping Explained
What is Regrouping in Maths?
Regrouping is the process of exchanging values between the place value columns of a number. Explained simply, regrouping is moving digits from one place value column to another.We regroup in groups of ten when moving between the ones, tens, hundreds and thousands place value columns.
For example:
- 10 individual ones (units) can be regrouped as 1 ten.
- 10 individual tens can be regrouped as 1 hundred.
- 10 individual hundreds can be regrouped as 1 thousand.


Teaching Regrouping
When teaching regrouping numbers it is useful to first show this concept using physical manipulatives, such as place value blocks (sometimes called Base 10 blocks, Dienes blocks or Multibase Arithmetic Blocks).This lesson uses base ten blocks to teach regrouping and it might be useful to work along with us using your own base ten blocks. If you do not have base ten blocks, you can download and print some along with a base ten place value chart above.
When starting to teach regrouping it is easiest to begin by regrouping units to tens.
Start with a collection of units (ones) base ten blocks and some tens rods. We can count the number of blocks in each ten rod to see that there are 10.
We will take some units blocks in the example below and see if we can regroup some as a ten.

We can line the blocks up and count until we make ten.
Remember that 10 individual one cubes can be regrouped as a single ten rod.
Regrouping the ten individual ones as a 10 rod, we have three left over.
10 + 3 = 13
Regrouping physical objects can make it easier to count them.
It is easier to see that we have 3 more than 10 when we have 1 tens rod and the 3 one cubes left over.
We will look at a regrouping example to practise regrouping 10 tens as a hundred. Again it is useful to try this yourself, using a collection of tens rods and hundreds flats (if you do not own Dienes blocks, remember that you can print some above).
Here are a group of tens rods. We will regroup some of the tens as hundreds.

We can count the tens rods until we get to 10.
10 tens rods can be exchanged for a one hundred flat base ten block.
Once the 10 tens have been regrouped as a one hundred, there are 5 tens remaining.
We have 100 (from the hundreds flat piece) plus another 5 tens.
100 + 50 = 150.
Again, it is easier to count these tens now that they have been regrouped. We can see that there are only 5 tens more than one hundred. Regrouping makes it easier to count.
Now we will look at how regrouping is used to move between place value columns.
When teaching regrouping numbers it is useful to represent the numbers on a place value chart with base ten blocks.
Here is an example of regrouping on a place value chart.
Remember that regrouping is used whenever there is more than 9 in a place value column.
Looking at the chart below, there are more than 9 ones (units).

We can circle 10 of these units. When teaching regrouping with base ten block images, a strategy is to use a pen or pencil to circle groups of ten.
We take these ten unit blocks away and replace them with a single ten rod, which is worth the same. However since it is a ten rod, it belongs in the tens column.

Here is the complete regrouping process.

To see the value of the number, we write down the number of blocks in each place value column.

We have 133 made up of ‘1’ hundred, ‘3’ tens and ‘3’ ones.
Here is another example of regrouping numbers on a place value chart.
Looking at the units column, there are 6 ones.
We need ten or more to regroup so we do not regroup these.

In the tens column we have circled a group of ten rods.
We will regroup 10 tens as 1 hundred.
We remove the circled tens from the chart and replace them with a hundred flat, which is placed into the hundreds column.

We now read the number of blocks in each column of the place value chart.

We have 346 represented by these base ten blocks.

Regrouping in Addition (Carrying) and Subtraction (Borrowing)
Regrouping is needed in both addition and subtraction. It is important to teach regrouping because it is necessary for understanding written methods of addition and subtraction. It is particularly the case for adding or subtracting numbers that contain more than 1 digit.
When performing addition, regrouping is often called carrying. Carrying is regrouping up through the place value columns, moving from units to tens to hundreds.
When performing addition, regrouping is used when the addition produces a digit larger than 9 in a place value column.
Here is an example of carrying / regrouping in addition.

When adding 38 + 16, we start by adding the ones (units) column.
8 + 6 = 14, which has two digits.
We write down the ‘4’ in the units but carry the ‘1’ over to the tens column using regrouping.

We add this carried ten as part of the tens column addition.
3 + 1 + 1 = 5

And so, 38 + 16 = 54.
In subtraction, regrouping is called borrowing. Borrowing is regrouping down through the place value columns, moving from hundreds to tens to units.
When performing subtraction, borrowing is used when the digit being subtracted is larger than the digit being subtracted from.
Here is an example of borrowing / regrouping in subtraction.
We have 36 – 18. The 8 is larger than the 6 and so we need to use regrouping.

1 of the tens is worth 10 ones. We can borrow a ten from the ‘3’ and it becomes a ‘2’. We can now write this ten in the ones column. Adding 10 to 6, we get 16.

16 – 8 = 8
And we can subtract the tens column now.
2 – 1 = 1.

36 – 18 = 18
Now try our lesson on 2-Digit Column Addition where we learn how to do 2-digit addition using the column addition method.


 The numerator of 2 in 2 / 5 means that two of the counters are purple.


