What does Translating a Shape Mean?
Translating a shape means to move it without rotating it or changing its size. All points in the shape move by exactly the same distance in the same direction.
The original shape is called the object and the shape that has been translated is called the image.
For example, translating a shape 3 right means to move it 3 squares right.

We can move the rectangle 3 squares to the right by sliding it right one square at a time.
When teaching translations it is important to emphasise that we move each corner of the shape. We can see that each corner of the translated shape is 3 squares to the right of where it started.

A common mistake is to believe that the translated shape and the original shape should be separated by the amount we are translating the shape by. We can see that although we have translated this shape by 3 squares to the right, there is only 1 square separating the original object and the translated image.
It is important that we move each corner separately.
We can see that each corner has been moved 3 squares to the right.
Here is another example of translating a square 5 left.
This means that we will move every point on the square 5 squares left.
We can see that every point inside the shape has moved 5 squares left. Every point in the shape has moved the same distance in the same direction.

Rather than moving each point inside the shape, we can just move the corners of the shape and then join them together to form the outside of the shape.
How to Translate Shapes
To translate a shape follow these steps:
- Mark all the corners of the shape.
- Move each corner to its new position by the amount given.
- Join these corners together to draw the shape in its new position.
Here is an example of translating a triangle 2 up.
The first step is to mark the three corners of the triangle.
We then move each corner of the triangle 2 squares up. We can move the three corners one by one.

We can see that the final image and the original object are the same size and shape. The shape did not rotate and remained in the same orientation.
Here is an example of translating a rectangle 4 down.
This means that we will move all of the corners of the rectangle 4 squares down.
We can move the bottom left corner of the shape 4 squares down.

We know that the bottom right corner will be in line with the bottom left corner.
We know that when a shape is translated it does not change size. The original object was 2 squares long and so, the image will also be 2 squares long.
We can count up two squares from the bottom corners of the image to find the top corners.
We can see that with simple shapes, we can just move one corner and then draw the rest of the shape in because the image will be the same size as the original object. This can be quicker than moving every corner one by one.
In school questions in both primary and secondary school, the translations we are asked to make will involve horizontal and vertical movements. It is rare that we will be asked to translate a shape diagonally.
Here is an example of translating a shape both vertically and horizontally.
We will translate this square 3 right and 2 down.
When asked to translate a shape both horizontally and vertically, complete the horizontal translation first and then move these points in the vertical direction separately.
We first move each of the corners of the square 3 squares to the right.

We mark the position of the corners after they have been translated 3 squares right.
We then move these corners 2 squares down to their final position.
We connect the corners to create the final image.
Here is an example of translating a rectangle 2 left and 6 up.
We mark all of the corners and move them all 2 squares left first.
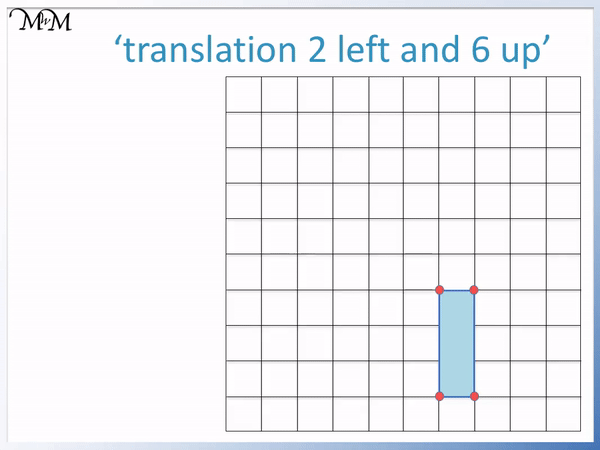
We can mark these points on our grid and then translate them 6 up.
We can then join these points to get our final image. We can erase the points that we drew to help us.
In this example of translating shapes on a grid, we are asked to translate this triangle 4 right and 1 down.

We first move the corners of the triangle 4 squares right and mark their new positions.
We can then move these points 1 down to obtain the final image position.


